Review: Knock off spinner tool from Oldtimertools.de
Is the knock off spinner tool from Oldtimertools.de worth the investment? Read on or jump straight to the verdict at the bottom of the page.
Anyone who has tried to use a lead hammer to loose or tighten knock off spinners knows about the sweat of anxiety that occurs in the seconds before lifting the hammer to place a precise stroke. A good and well-known trick is to use electrical tape that is wrapped around the spinners before using the hammer and if you are lucky you avoid scratches and marks in your spinners or even worse on the car. As classic cars have become more expensive and most people consider their classics as a piece of jewelry rather than a utility item, a number of spinner tools have appeared on the market which make it much easier and safer to remove and mount wheels with knock off spinners.
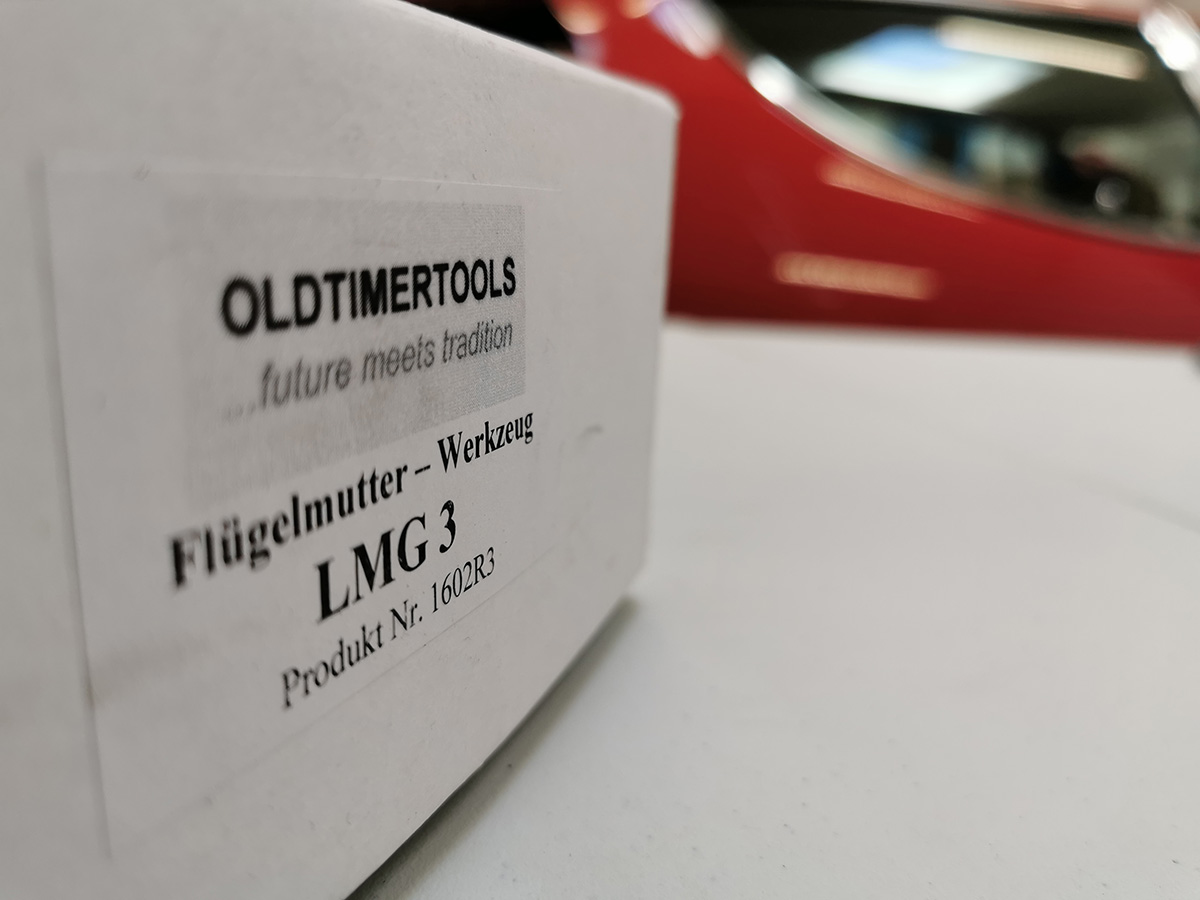
One of these knock off spinner tools is produced by Oldtimertools from Germany who have been in the field for more than 15 years. All spinner tools are tailor-made for each type of spinner and Oldtimertools offers their tools for more than 35 different car makes. I have now had my spinner tool for more than 2 years and thought it was time for a review of whether it was worth the invested 369,- EUR (400,- USD) for the premium version for Lamborghinis called the LMG-3.
What’s in the box?
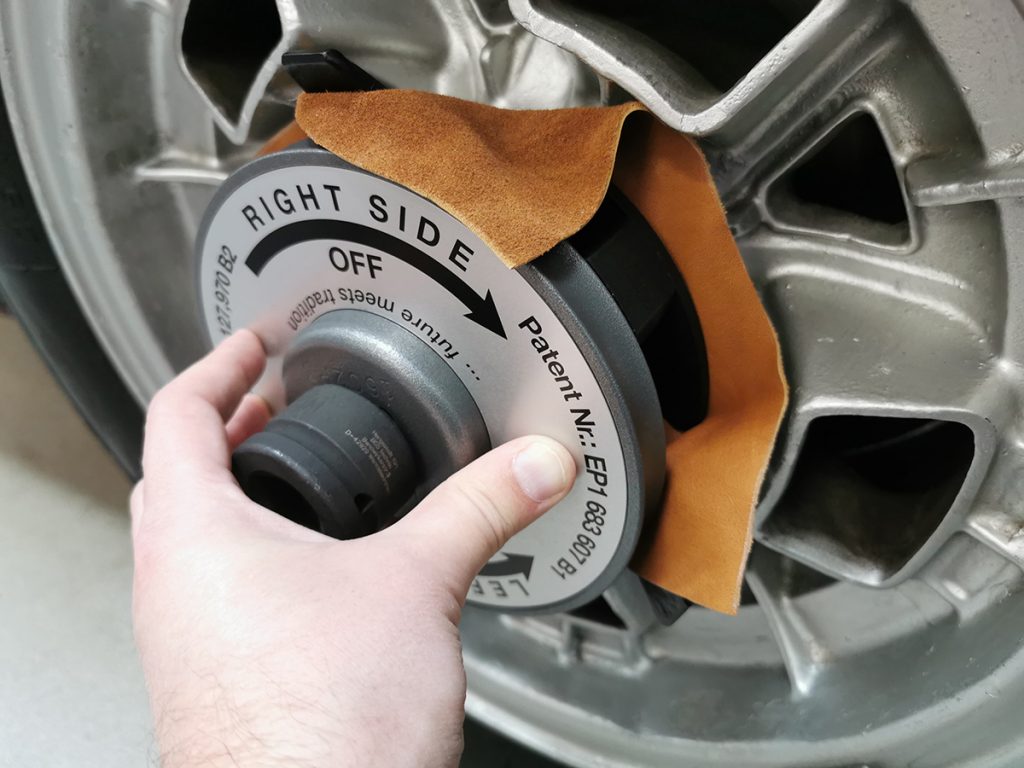
The LMG-3 Premium spinner tool was delivered in a box along with a piece of leather and a piece of fabric to protect the knock off spinners when using the tool. Oldtimertools offers a large selection of accessories, ranging from torque wrenches and adapters to beautiful vintage-style leather bags for storing the tool in the car.
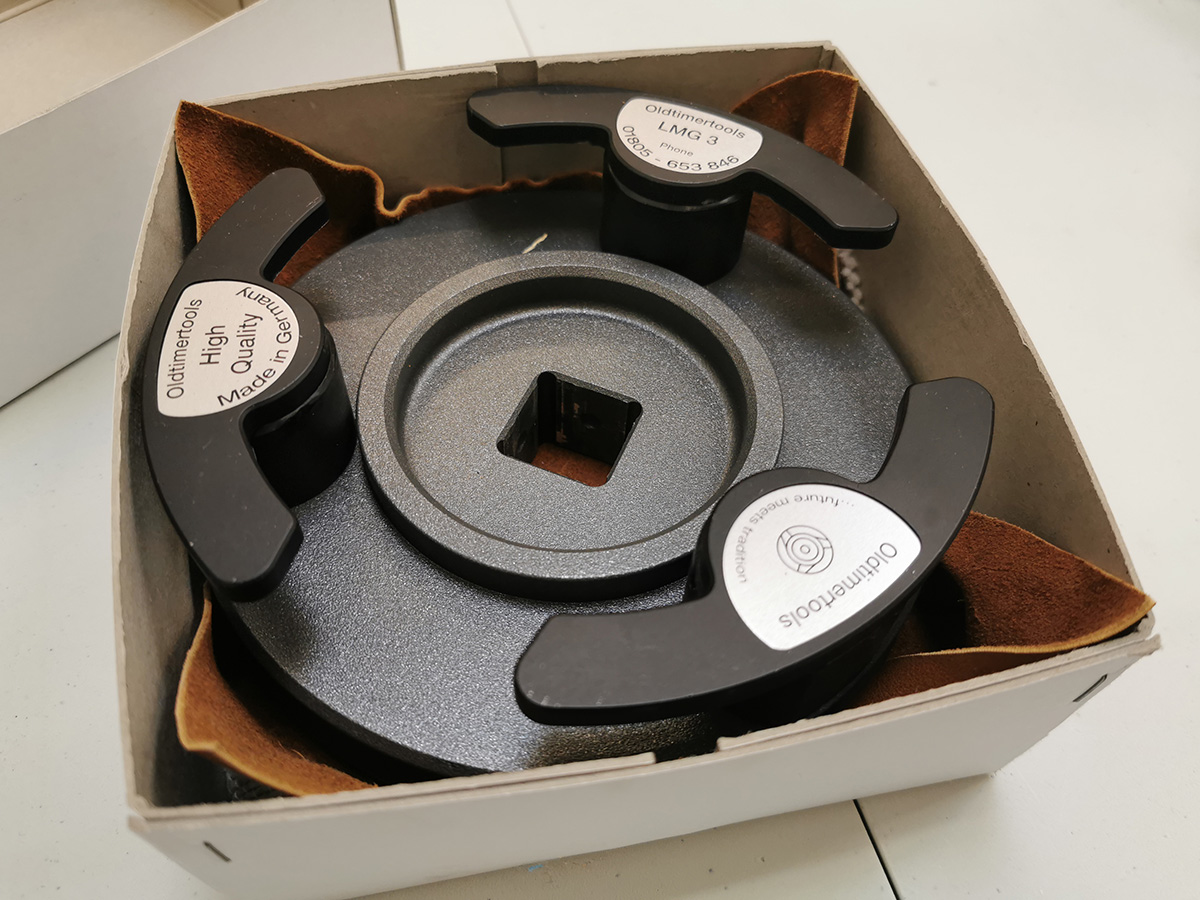

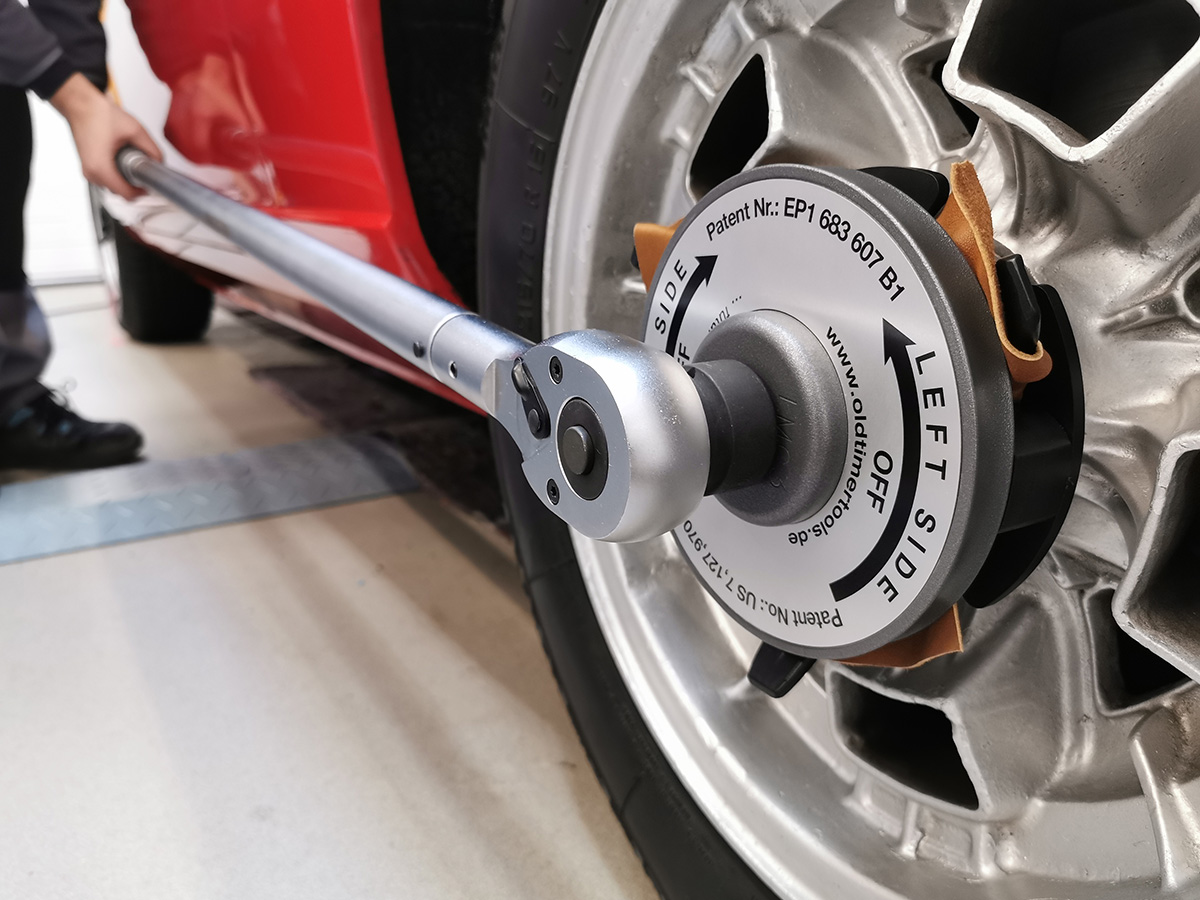
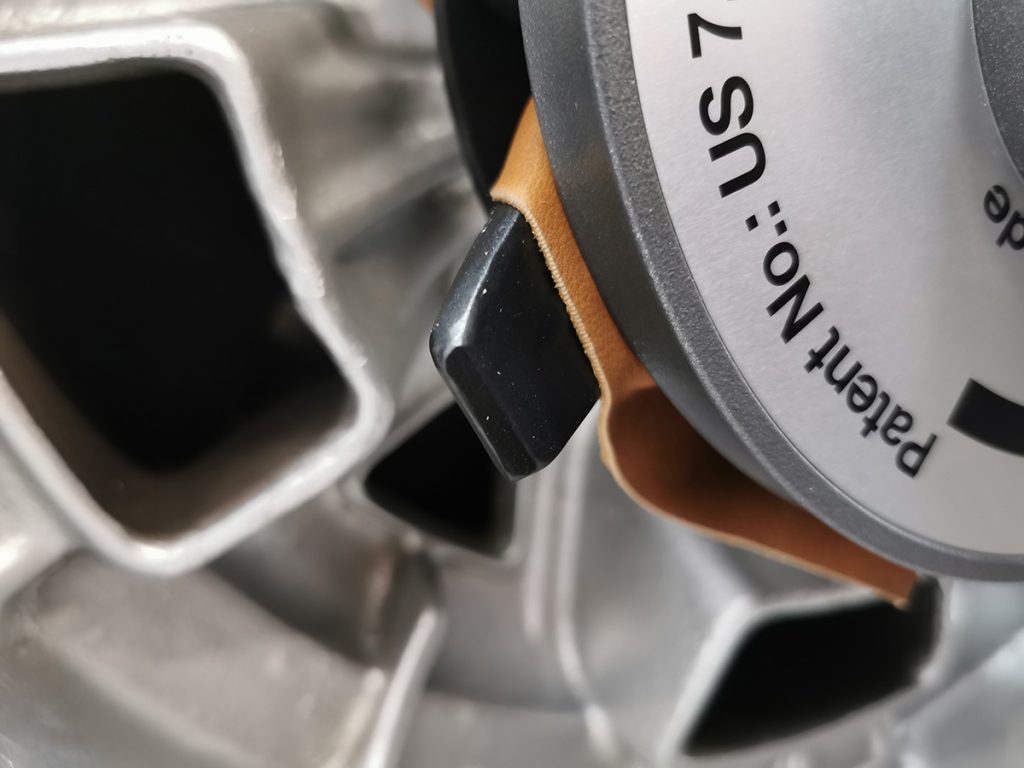
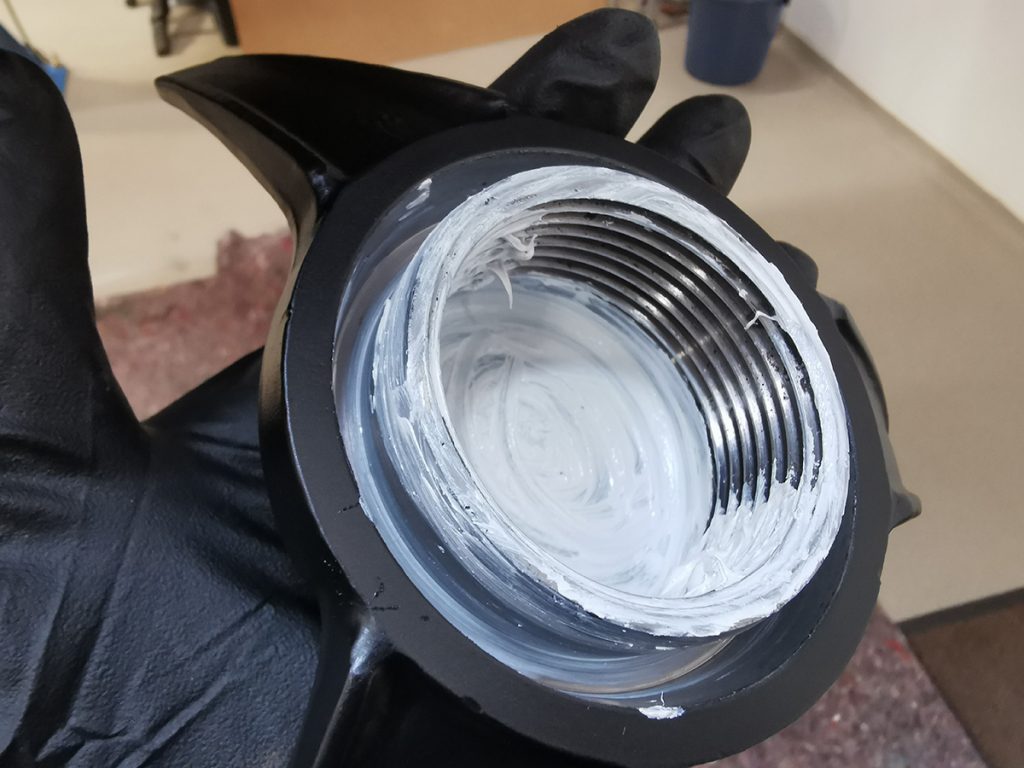
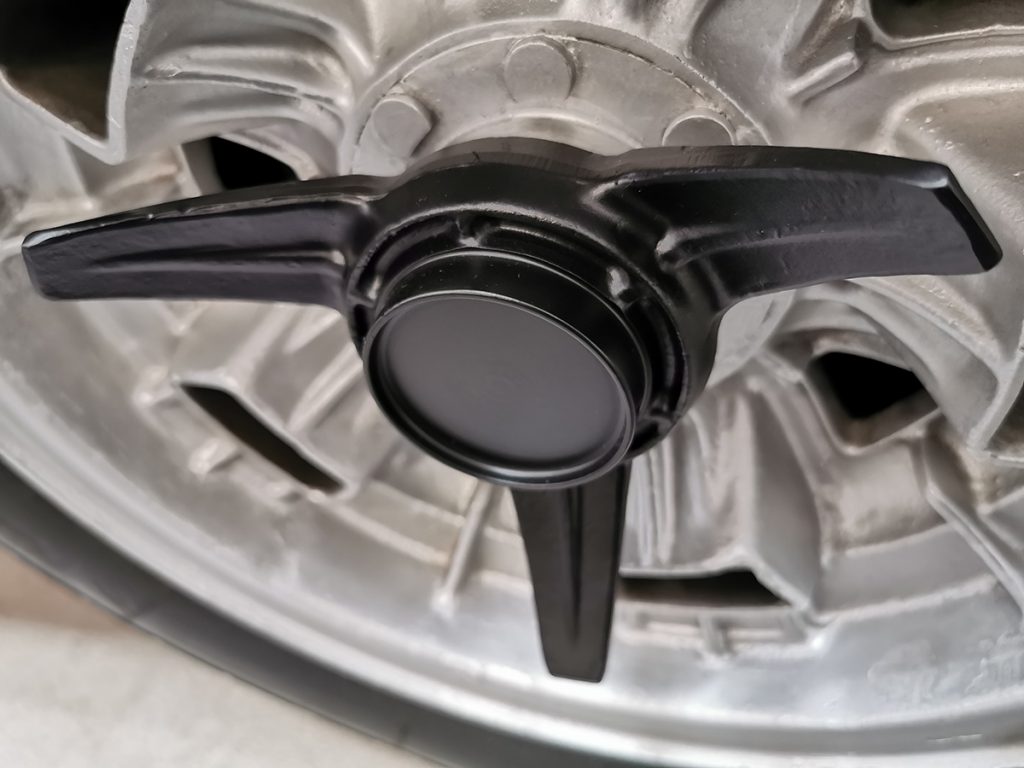
The spinner tool which are made of high-strength aircraft grade aluminum alloys has a diameter of 17 cm, and with a weight of only 1,4 kg the tool still feels very solid. The disc shape which is the main part of the tool are cast and machined in one piece and finished with a durable layer of gray powder coating. The three rods that are applying their forces to the spinners sides are covered with a black high grade plastic coating to protect both the spinner and the tool and over time this plastic will get some marks from the forces, but after 2 years of use it seems to be very durable and a well thought out solution. At the end of the rods there are attached a 6 mm thick curved flange which locks and holds the tool to the spinner when it is fully turned. These flanges are painted with a thinner layer of satin look black paint which is considerably more fragile for scratches than the rest, but since this is a tool and not an exhibit object I do not see this as a problem at all.

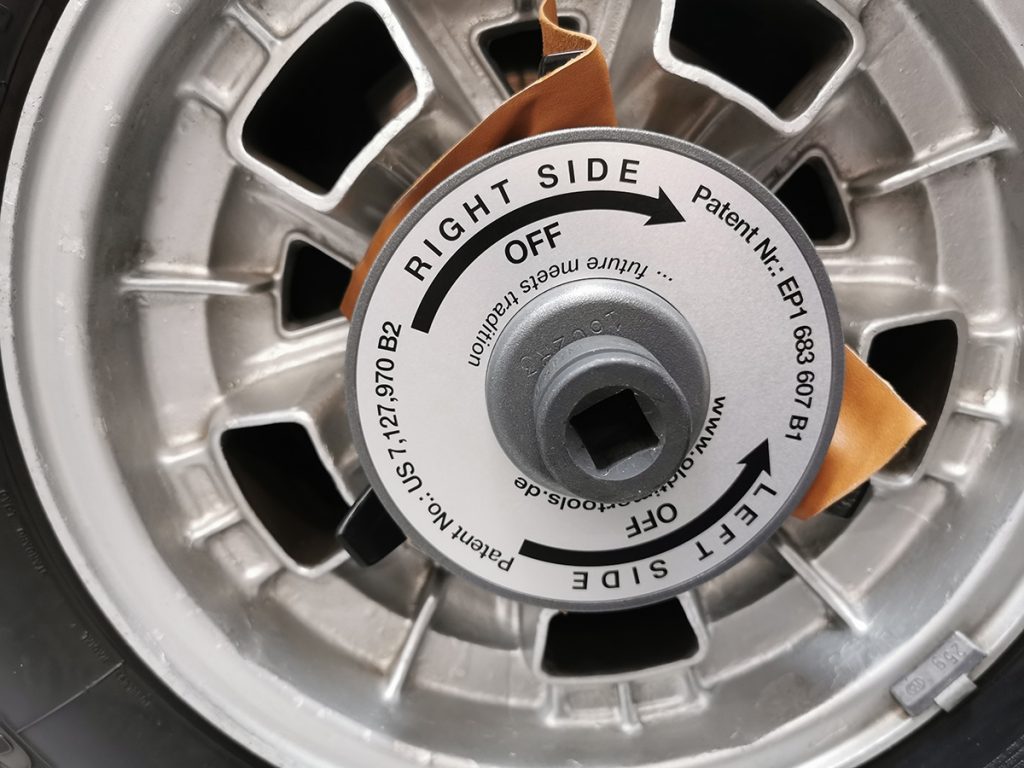
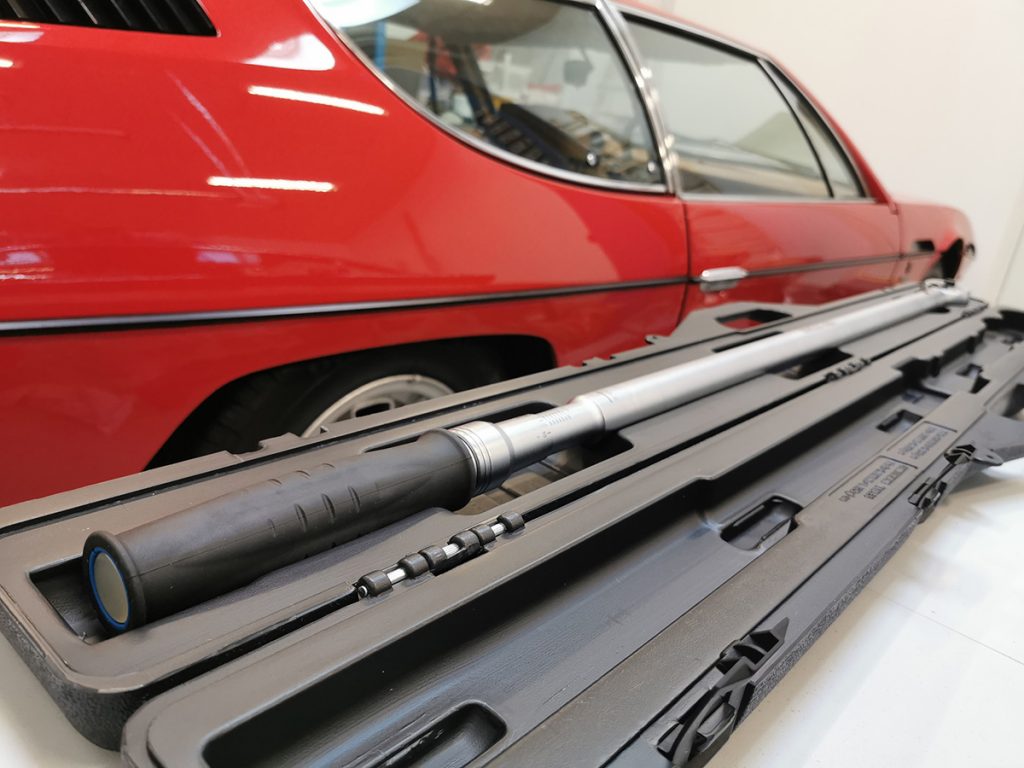
The drive for the tool are 1″ which is huge for most tool collections, but I think this is a good choice as it is significantly easier to use large wrenches without adapters to remove knock off spinners if they are almost stuck. I bought a 3/4″ to 1″ adapter along with spinner tool since my largest torque wrench are 3/4″. I would definitely recommend using a 1″ joint handle without an adapter for unscrewing as it provides a more stable handling in the case a lot of effort is needed to release the spinners. However, it is no problem to use an adapter on the torque wrench for the tightening as the forces here are far less.
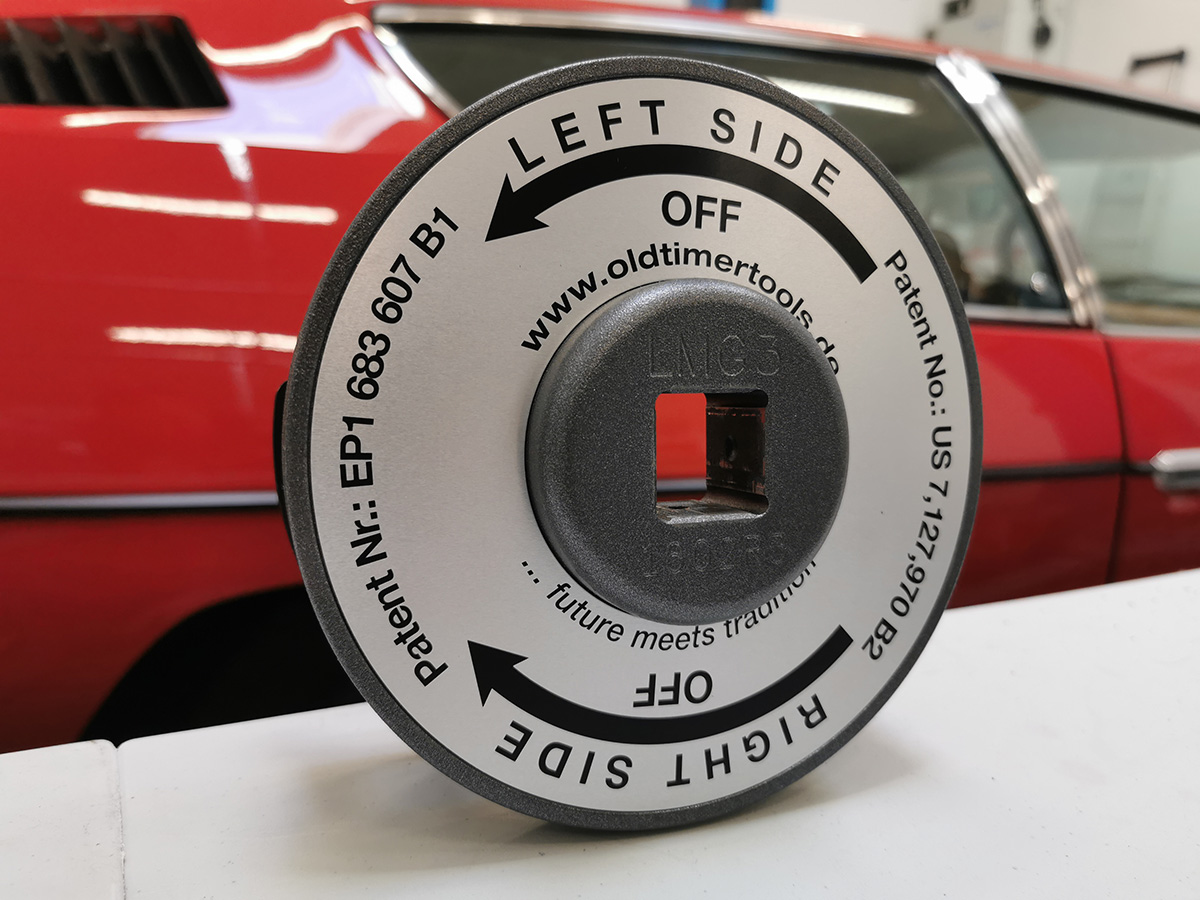
The disc is fitted with an aluminum plate sticker indicating the right and left side screw directions. This may seem unnecessary to some, but I find it more convenient than I had expected since I don’t have to spend time thinking about if I’m turning in the right direction.
Loosening the spinners
In rare cases, the spinners may be seized so it is impossible to loosen them without using a lead hammer. The impact of a punch is effective in loosening firmly seized objects and this effect cannot be achieved with a spinner tool. But if you remember to lubricate the threads with anti seize when mounting the wheels then you should be able to avoid the hammer.


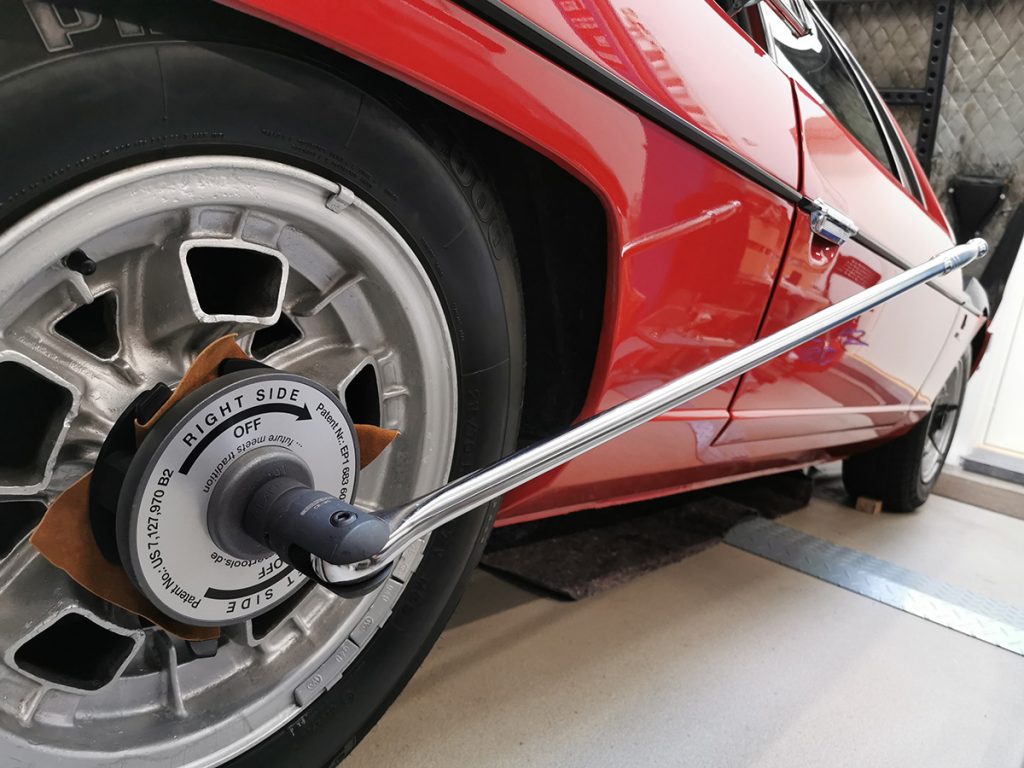
I’m using a 1000 mm 3/4″ joint handle and I will not recommend anything smaller than that. If it wasn’t because I already had my 3/4 “handle then I would go for a minimum 1200 mm with 1” drive. For some strange reason knock off spinners often get tighter while driving so sometime you will have to put a lot of effort into loosening them. My handle bends a lot and the joint feels undersized so I would clearly prefer a bigger handle so there is more control and less force is needed. However, the spinner tool shows no signs of weakness or bending / deformation which is a good thing.
Tightening the spinners
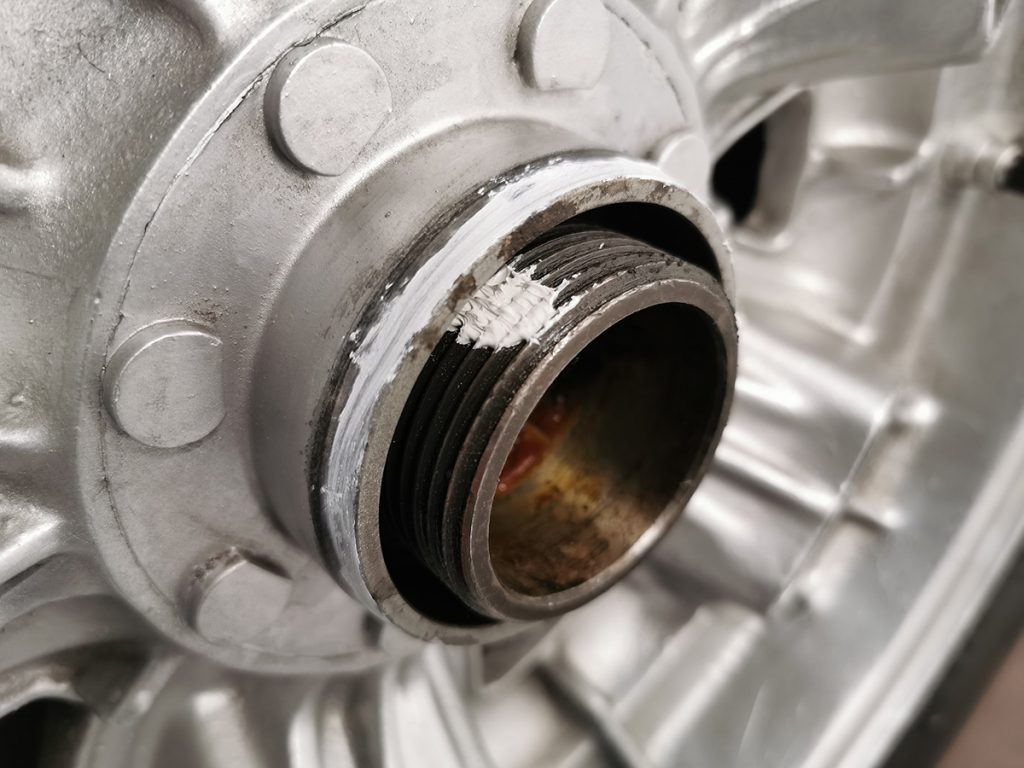
Before tightening the spinners I have cleaned all the threads and then applied some anti seize on all mating surfaces to prevent seizure and corrosion. Some have strong opinions about what type of anti-seize to be used but I have never heard of any problems using copper, zinc or metal free compounds.
My Espada left the factory in Sant’Agata with the rare option of black painted knock off spinners, and over the years they have got a lot of beating, so now that I have repainted them it is a pleasure that they are no longer being dented or scratched by the hammer.


And what is the correct torque setting for tightening knock off spinners?
Oldtimertools.de recommends the following:
“With a central locking rim, be it with spinner, octagon or oval central lock, we recommend the defined torque to be 300 Nm (258 lbf ft) for vehicles with an engine power up to 400 PS and 500 Nm (368 lbf ft) for vehicles with engines having more than 400 PS.”
These rules of thumb from Oldtimertools align nicely with what I have been able to find myself. It is relatively difficult to find information on this topic, but here are some examples of torque settings I found:

Lotus Elan (racing) 475 Nm
Lotus Elan (road) 300 Nm
Ford GT40 (racing) 475 Nm
Corvette (racing) 610 Nm
I went for 350 Nm on the Espada which I have used for the last 2 years. After a short test drive I have re-tightened them with the torque wrench at 350 Nm, and they have not moved a millimetre so 300 Nm is most likely sufficient.

350 Nm on a 1200 mm torque wrench does not require much force but only moderate pressure. There is a good contact surface through the spinner tool which gives you a nice feedback and a safe feeling of the spinner to be sufficiently tightened. The clearance between the torque wrench and the car body is small, but by keeping the wrench low where most cars are a little narrower is no problem, and if you are working on the front wheels, these can simply be turned slightly to provide better space.
Job done, with no scratches or chips on the painted spinners or the car. With this tool, I spend under five minutes loosening or tightening all four spinners so it’s only slightly slower than the lead hammer, but feels far more controlled and safe.
And finally the mandatory warning: Always remember to re-tighten/check your spinners after a short test ride.
Verdict

So would I recommend buying the knock off spinner tool from Oldtimertools.de? Yes, without any hesitation! It’s not cheapest tool out there, but after using this tool for more than 2 years i will never go back to my lead hammer.
The Premium LMG-3 knock off spinner removal tool feels solid and will most likely last as long as your spinners. It is manufactured very precisely so that the tolerances are neither too small nor large when used.
There are several benefits to using a spinner tool. It is fast and convenient, there is minimal risk of scratches and not least it gives a better assurance that the spinners are tightened to the correct torque.
369,- euros is not cheap but this price tag is understandable as it is costly to manufacture and sell special tools in smaller quantities. If you compare this investment with the damage you can easily inflict by using a lead hammer then the price is actually quite reasonable. Had it not been for the slightly high price tag then I would have acknowledged with all 5 stars.
This is not sponsored content but merely an expression of my own experience and opinion.